Creating an Ubuntu VM using Hyper-V
Creating an Ubuntu VM using Hyper-V using the Quick Create feature is a quick and easy way to get a VM up and running. It also configures the VM with Integration Services so you can do cool things like resize the VM window and share your clipboard between the host and the VM. Unfortunately, it does not support the most recent versions of Ubuntu and it creates a really small disk. This post will tackle the second issue by creating a VM with a small disk and then expanding it. This is useful for any other linux VMs you create that need more space. We will walk through the process from the beginning, but if you already have a VM created, you can skip to the section on expanding the disk.
Please note that I am using Hyper-V on Windows 11. The steps should be similar on Windows 10, but I have not tested it. Also, I am running on an AMD processor, so if you are running on an ARM processor, you will need to find a different live iso of GParted. At the time of writing, the GParted live CD does not support ARM processors.
Create the VM
- Open Hyper-V Manager
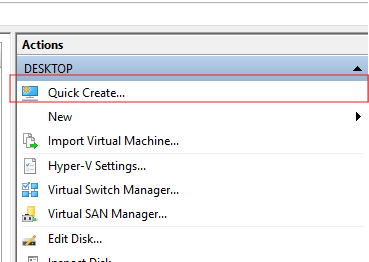
- Click on
Quick Create...in the right pane, under actions
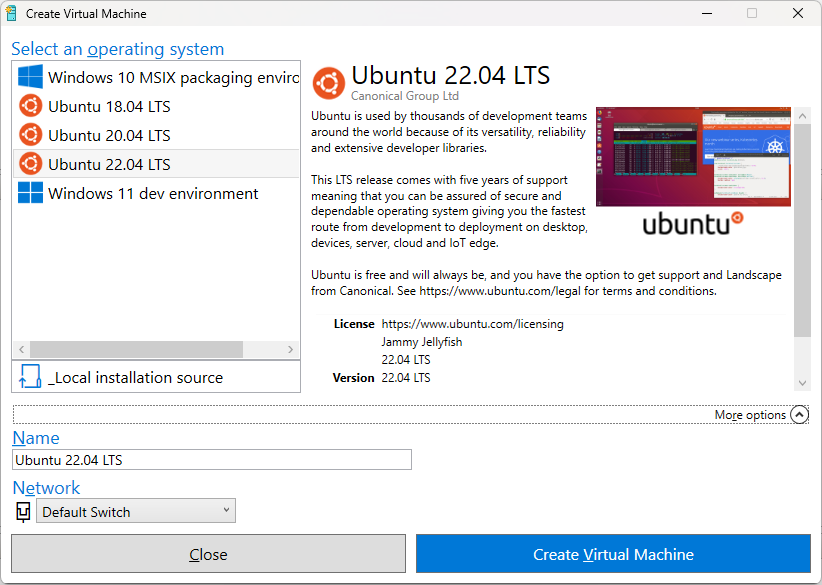
- Select
Ubuntu 22.04.1 LTS(or whatever version is available) - Change the name of the VM if you would like and click
Create Virtual Machine
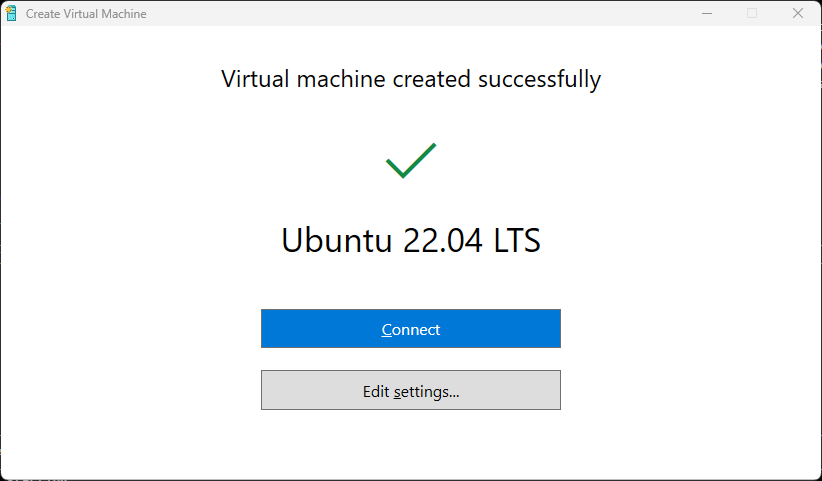
At this point you will have created a VM with a 12GB disk. This is fine for a lot of things, but if you need more space, you will need to expand the disk. Let’s do that now.
Expand the disk
You will need to shut down the VM to expand the disk. Do that now if you haven’t already. If you just created the VM, it is already shut down and you can click on the edit settings screen:
You can also do this from the Actions Pane in Hyper-V Manager. Right click on the VM and select Settings...
You should now be at the edit settings screen.
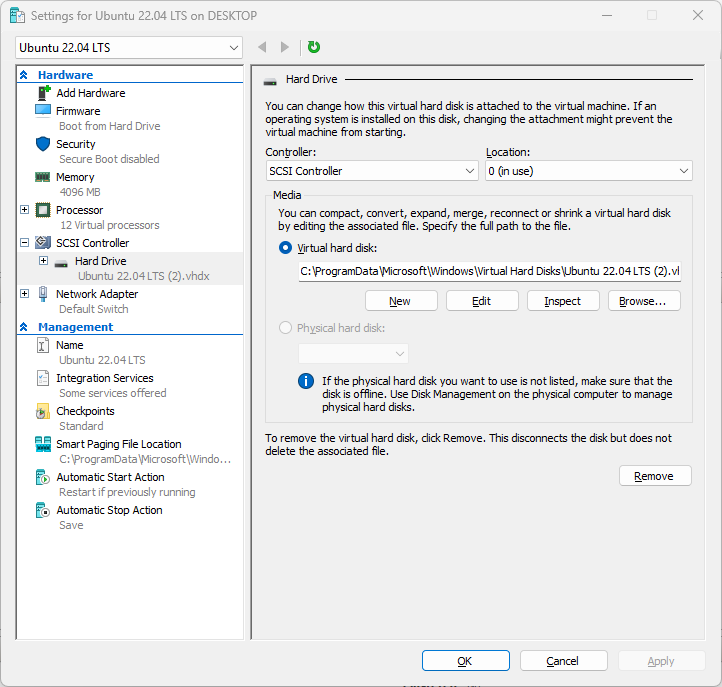
Click on the hard drive and then click Edit... and then Next on the first screen. Select Expand and click Next.
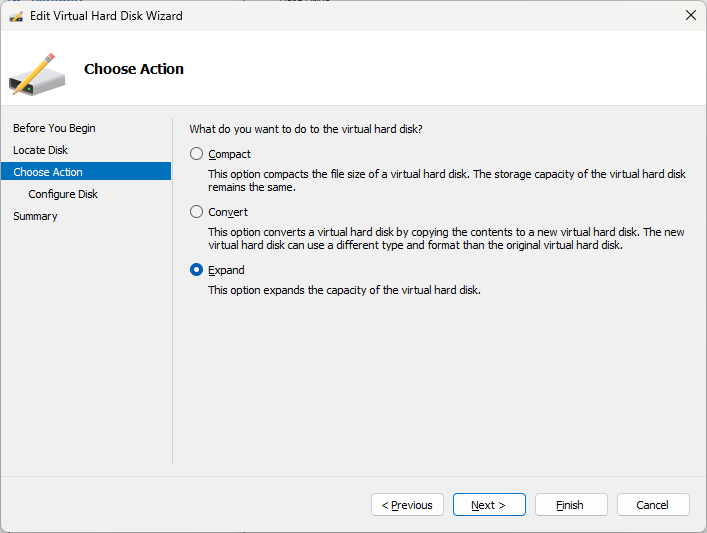
Select the new size of the disk. Click Next and then Finish.
At this point, the disk is expanded, but the partition is not. You will need to boot into a live CD to expand the partition. We will use the GParted live CD for this, since it’s easy to use.
Boot into GParted Live CD
First, we will need to download the GParted Live CD. You can get it from here.
This is what that looks like today:

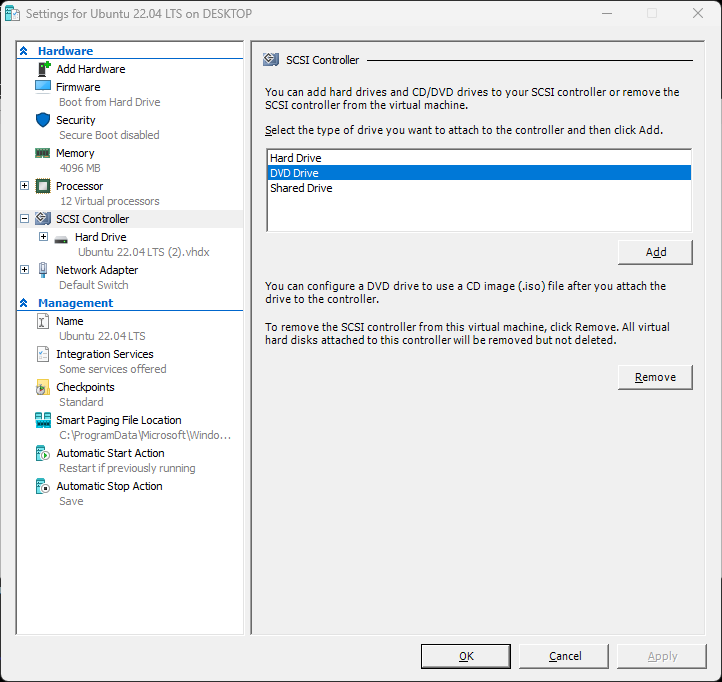
Once you have downloaded the .iso file, you will need to attach it to the VM. You can do this by clicking on the VM in Hyper-V Manager and then clicking on Settings.... Click on the SCSI Controller and add DVD drive.
Then select Image file: and browse to the .iso file you downloaded.
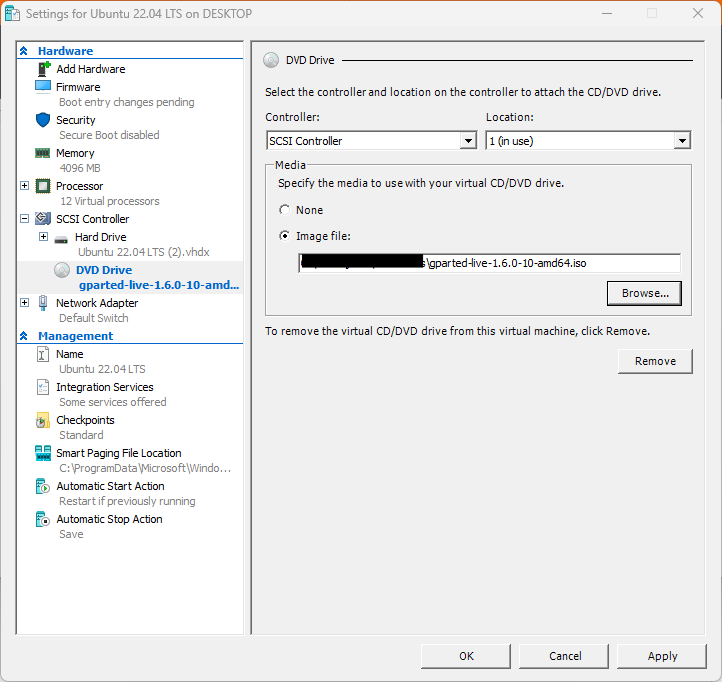
Click Apply.
Now we will need to move the ISO up in the boot process, so that it starts the VM directly from the ISO. Click on the Firmware option and move the DVD drive to the top of the list.

Click OK.
Now you can start the VM. It should boot directly into the GParted Live CD.
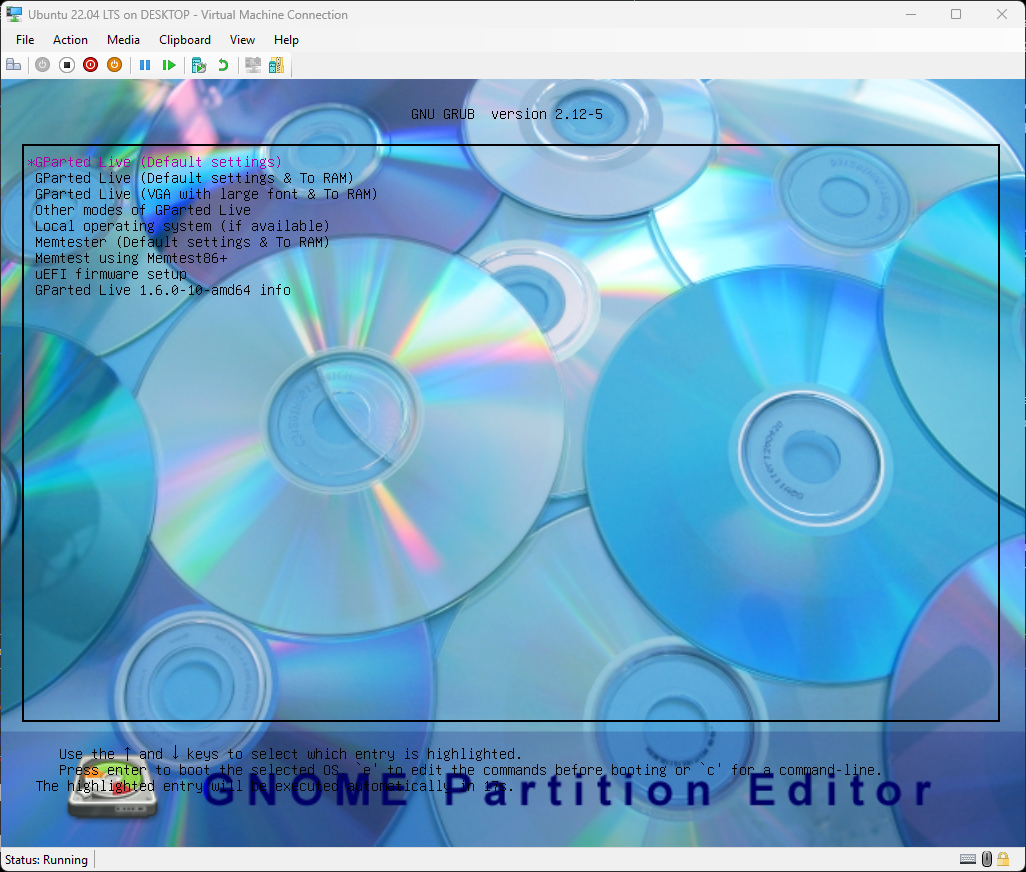
Select the default option and press enter. A few options will display, but you can just press enter to select the default option. Eventually it will ask for a language. Select your language and press enter. After all that, you will be at the GParted screen.
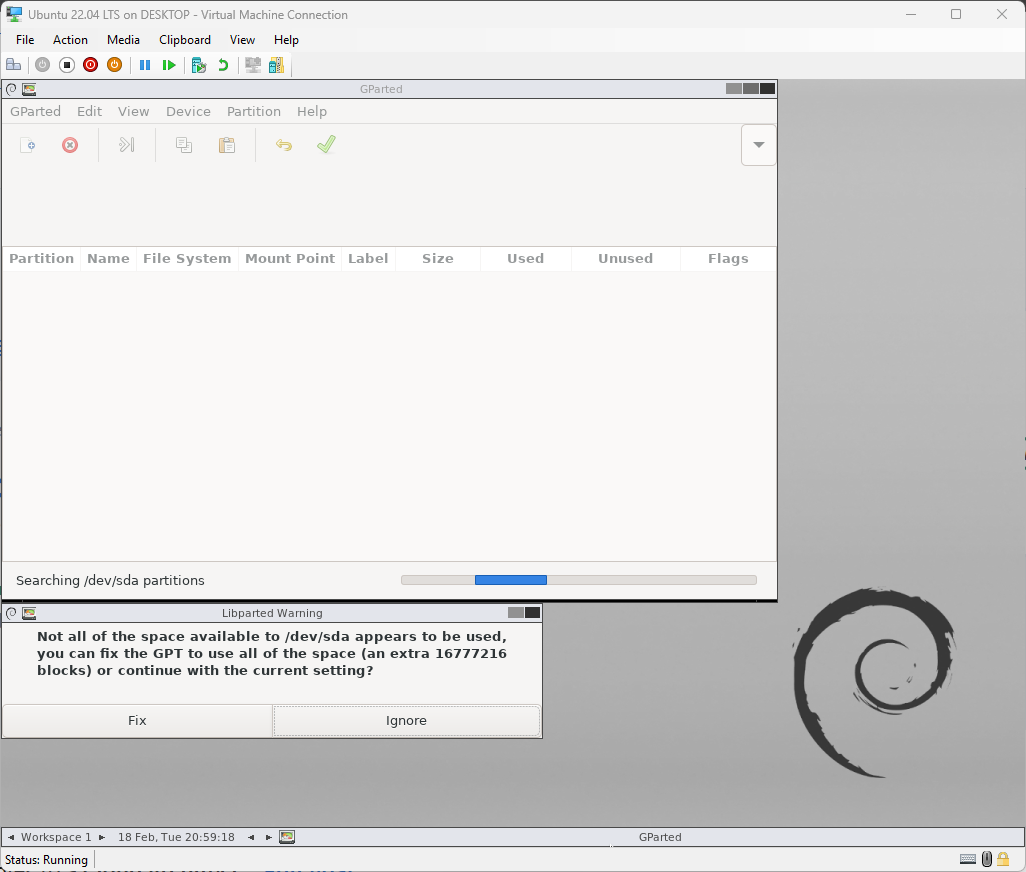
When you reach the default screen, you will likely see a prompt telling you that there is extra unused space. You can click on fix to expand the drive.
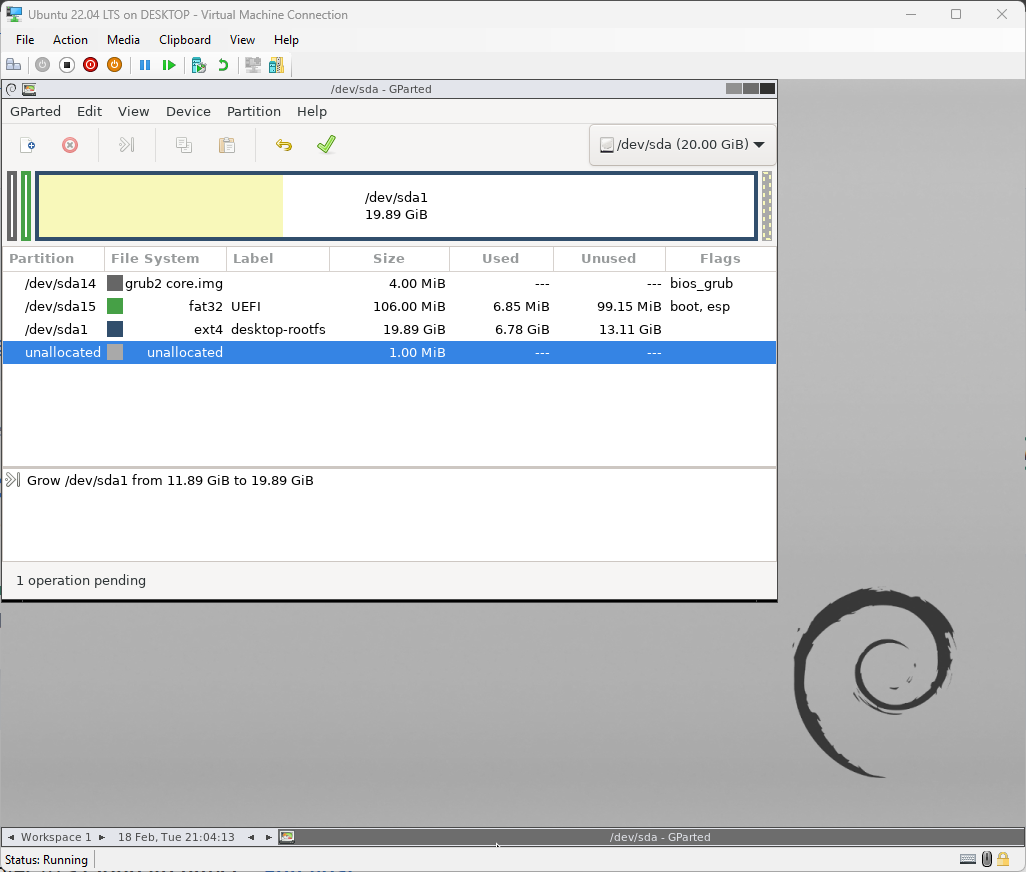
When you click on fix it will take you to the partitions screen. You will see the partition you need to expand. Right-click on the partition and then click on the Resize/Move option. In this default setup it is /dev/sda1.
Next you will see a screen where you can resize the partition. You can just click on the right arrow to expand the partition to the maximum size. Click Resize/Move. Now you will see the partition is expanded, but you still need to apply the changes. Click on the green check mark to apply the changes.
You will see a screen with a summary of the changes. Click Apply to apply the changes. Once the changes are applied, you are done! You can now shutdown the VM and remove the GParted Live CD from the DVD drive.